NGD or the birthin' of a ratter-caster

ratter

New member
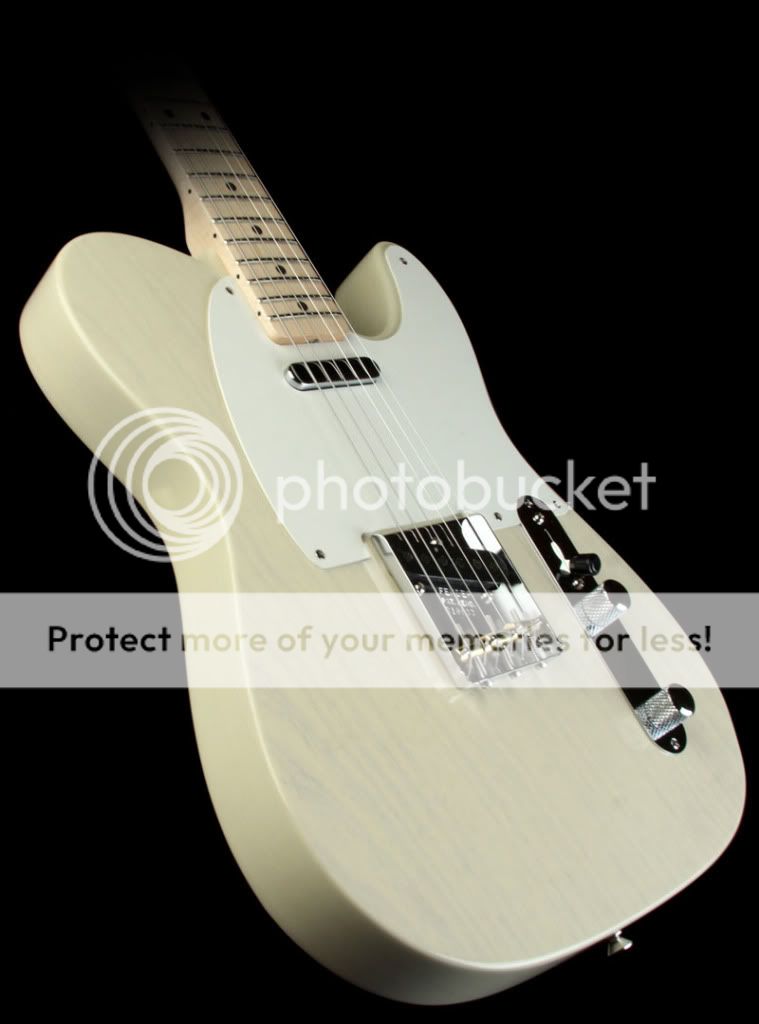
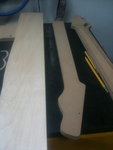
Skip ahead to the money shots...

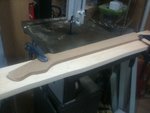
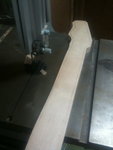
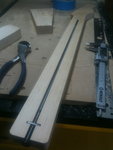
A fellow RT'er is having an ampfest this weekend. I wanted to put together something to bring along. Can we build a guitar in a week or so? A guitar that doesn't completely suck? I think that remains to be seen. But I'm going to cheat a bit, so maybe.

The first thing to do is pick appropriate birthin' music and away we go.

IMG_0931.jpg


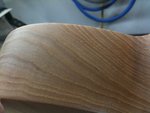
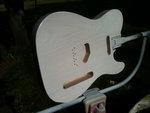
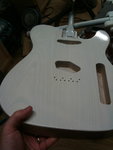
Like any good build, it starts with a delivery from the lovely Pacific Northwest.

IMG_0938.jpg


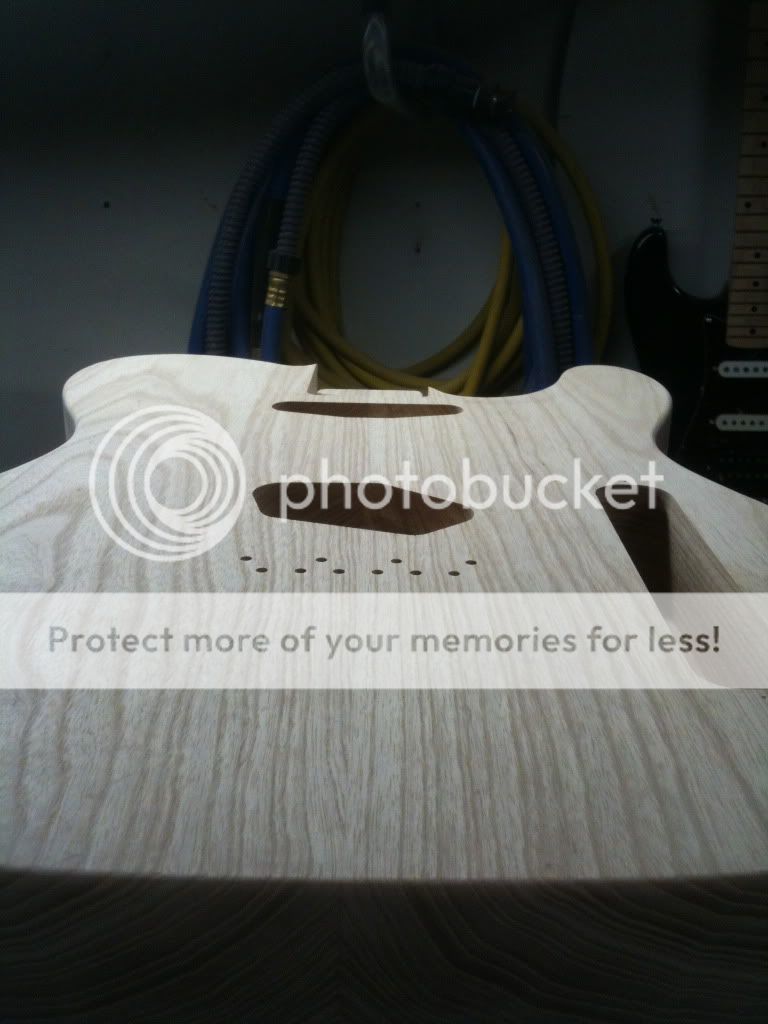
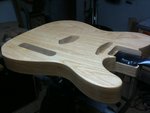
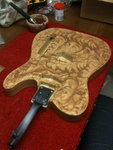
Next up, opening the box!!
 
SONOFABITCH THEY FORGOT TO CUT THE WOOD :gethim: :gethim:

(click thumbnails to enlarge)


Joking of course....I order body blanks from Warmoth because the quality is great and the price is reasonable. Speaking of price, maybe we can tally up the materials in case anybody is insane enough to build guitars in order to try and save money...(and we definitely won't count the tools!)

1 Swamp Ash body blank plus shipping - $100

The wood cutting part isn't such a big deal because I also bought one of these...

 
Oh and that gets me to the cheating part. Normally I think it's a good practice to build (or acquire) the neck first if for no other reason than it's easier (IMO) to get a good neck-to-body fit if the neck is done when it comes time to cut the neck pocket. But in this particular case since I was in a hurry I'm going to be using a body that was already made. I made it towards the end of the summer. The upside of that is that the paint had plenty of time to dry.

So this is the story of that summertime body and we'll get to the neck later...

The original inspiration for the guitar was something like this, a '54 blonde Custom Shop model, but we will tweak some things along the way out of necessity and just cuz...

Fender_Custom_Shop_54_Telecaster_Vintage_Blonde_R10833_1.jpg


But swamp ash is the common starting point. The swamp ash blank from Warmoth comes beatifully glued up, planed, sanded, etc. They can do it as well or better than I can frankly, and I can't get swamp ash lumber anywhere within a day's drive, so I don't mind paying the premium getting it from them. It's not always super lightweight (this piece wasn't) but they are rarely boat anchors. To my knowledge, they pull the pieces straight from their working stock. That's good enough for me...

Since it's so well prepped, it gets plopped right on the CNC:

 
The beauty of a CNC machine is that it can work very precisely, usually pretty quickly, and with your hands nowhere near anything really sharp spinning a 20k RPM.

The bitch of it is learning to program and operate the damn thing. When it comes to tele bodies though a lot of the work has been done already. Two guys over on the Telecaster Forum (Ed Hawley and Terry Downs) have posted very authoritative plans/blueprints/CAD files that give anybody willing to look a big headstart. You can bet your ass that a great many of the telecaster bodies (and the bodies on finished t-style guitars) you find for sale on the forums and eBay started with those plans. So raise your glass to them. For this body, I started with those plans. I altered the neck pocket a bit for a few reasons, and tweaked the bridge spacing to match the particular bridge I planned on using. A couple other things here and there...But those were minor tweaks mainly to accomodate my choice of parts, method of fixturing and so on.

The body blank starts face down. String-through holes get drilled about a half-inch deep with a 1/8" bit. Then a 3/8" bit follows to drill the ferrule holes. The 1/8" bit also does the neck mounting holes up at the heel end, halfway deep through the body and two index holes along the centerline that will be used when the body gets flipped. That's it for the backside. You gotta love a Telecaster!


Those two registration holes mate up with steel pins in the machine table so when I flip the body face up, I have it very precisely aligned. Once it's on the table face up, all the top pocketing starts - neck pocket, pickup pockets, control cavity, and the bridge mounting and string-through holes (to meet up with the holes that were drilled in from the other side.

Bridge holes:


Neck pocket:


Pickup and control routes:

 
A couple of other things happen while it's face up. Neck mounting holes are drilled down into the neck pocket to match the corresponding holes on the backside. A small v-shaped bit is used to just mark the position of the screw holes for the control plate. They'll be drilled by hand later because they're smaller than my 1/8" bit. And finally, I do a very shallow pass of the body outline to mark it. From there the blank goes to the bandsaw and the bulk of the waste material is cutoff:


It's not really necessary but I like to do it because it prevents large waste pieces from flying at my head when the perimeter of the body gets cut. Also, the amount of chips/sawdust created is really truly incredible. So any waste material that can be taken off in big chunks ahead of time is always a good thing...

Once it's roughly cut out on the bandsaw, it goes back on the table and the perimeter gets cut with a big honkin' spiral bit. It takes a few passes:


And it comes off the machine looking like this:


Not too shabby. It's probably hard to tell from the photo but the edge is still quite rough. Lots of chatter, dimples ("dwell" marks) etc. It's definitely nowhere near "done". Maybe it's a different story on the big $$$ "pro" CNC machines that the big companies use, I don't know. But for me, there's still a ton of sawdust in my future.

It's a good thing nobody ever told me how much goddamn sanding was involved or I never would have even tried...

Sand sand sand. Go get something to eat. Come back and sand some more. Go to bed. Wake up and sand some more. Spindle sander, palm sander, sanding blocks, so on and so forth, ad infinitum.

But after the dust literally settles it is starting to look pretty good:


IMG_1120.jpg


The outer edge has to get really well sanded before the next few steps...
 
Hmmmmmmmmmmmmm, were the 2 bodies I got pre cnc?? I smell PRS garage days profit coming :D

So THAT is why those two extra holes are there in the body!!!!! Very cool piece of info :thumbsup:


Mike, a 3ply mint humberbucker cut pickguard is the only hold up right now, I am so close :doh:
 
Next up is the roundover. That's where you use a bit like this.

36784408m.jpg


to take the hard edge off the body. There's a ball bearing that rides the side of the body - that's why the side needs to be sanded perfectly first, otherwise that ball bearing will be riding a lumpy wave and leave you with a lumpy roundover. To the router table...


The roundover bit does everything except the neck heel area. That part is sanded and blended in by hand:


I can't find a picture but the side jack hole also has to be drilled, of course. But at that point, you've got yourself a guitar body. A fine looking piece of ash if I do say so.

IMG_1128.jpg
 
Digital Jams":2z3pclrh said:
Hmmmmmmmmmmmmm, were the 2 bodies I got pre cnc?? I smell PRS garage days profit coming :D

So THAT is why those two extra holes are there in the body!!!!! Very cool piece of info :thumbsup:


Mike, a 3ply mint humberbucker cut pickguard is the only hold up right now, I am so close :doh:

Yep, yours were done by hand. The two holes in that case (and two more on the front that don't happen here) are for attaching the routing templates. Funny part is, it's actually quicker by hand! But don't tell the "handmade" police! :poke: :D

Pickguard...I've had real good luck with this guy:

http://www.terrapinisland.com/

I'd cut you one but I have no mint...
 
ratter":19iy2620 said:
Digital Jams":19iy2620 said:
Hmmmmmmmmmmmmm, were the 2 bodies I got pre cnc?? I smell PRS garage days profit coming :D

So THAT is why those two extra holes are there in the body!!!!! Very cool piece of info :thumbsup:


Mike, a 3ply mint humberbucker cut pickguard is the only hold up right now, I am so close :doh:

Yep, yours were done by hand. Funny part is, it's actually quicker that way! But don't tell the "handmade" police! :poke: :D

Pickguard...I've had real good luck with this guy:

http://www.terrapinisland.com/

I'd cut you one but I have no mint...

I have an email into pickguardian, no reply yet but he has been off during the holidays and may be backed up.

I could buy blind off ebay but this guitar has turned into something special, all vintage wiring, NOS brass, Duncan Pro Shop, Fender CS paint, etc.

You are going to love the location I have picked for the photo of the two teles together, Jol would be proud :D
 
Not only does sanding suck, but sandpaper is not free. The good stuff is really not free. If that $150 body on USACG's "Web Specials" page isn't looking like a hell of a deal to you right now, IT SHOULD BE!

The bitch of swamp ash is the grain. It's only slightly less porous than your average kitchen sponge. The end grain looks this this:


A bajillion goddamn HOLES! Before you can get any kind of smooth finish, you have to fill that grain.

Onto the paint stick it goes, for a couple light coats of sanding sealer (Seagrave/McFadden's vinyl sealer, $30/qt).


Then the grain filling begins. Timbermate ($7). It's this wood putty type stuff that you thin with water (hence the sealer coat, so the wood doesn't just soak up all the water and absorb the color of the filler). You smear it on, let it start to harden, then scrape it off. I tinted it with some brown dye ($18). That way the filler (which only ends up in the grain pores) will accentuate the grain and help it show through the blonde finish a bit better.


Rinse and repeat, sometimes with sealer coats in between, until the grain is filled. I think it took 3-4 passes here and I still have a pinhole or three. Once the grain is filled, it's sanded again and sealed again.

Finally it's ready for some paint! Seagrave/McFadden nitro lacquer ($25/qt), colored with some white pigment ($13) and a pindrop of amber dye ($18). A few color coats, a couple clear coats. I tried to go as thin as I possibly could at the risk of ending up with a less-than-perfect finish. A few coats a day, for a few days, and then the waiting begins...


Attachments

  • IMG_1121.JPG
    IMG_1121.JPG
    1.1 MB · Views: 7,245
  • IMG_1132.JPG
    IMG_1132.JPG
    887.9 KB · Views: 7,246
  • IMG_1137.jpg
    IMG_1137.jpg
    1.3 MB · Views: 7,248
  • IMG_1146.jpg
    IMG_1146.jpg
    799.2 KB · Views: 7,248
  • IMG_1148.jpg
    IMG_1148.jpg
    975.6 KB · Views: 7,249
So the body dried for weeks. I had a different neck or two on it as a test bed. Then the ampfest came up, and I thought this is a perfect opportunity - I'll put a new neck on this body and have a new guitar to take along...

With the body in the can, we go back to the woodpile. I don't have many progress pics of the neck I ended up using, so I'll use a mish-mash of pics from it and other neck builds to fill in the blanks.

The maple I got locally. If you get a good quality plain maple neck blank online from Warmoth or similar, it usually runs $20-25 plus shipping. But here in the Northeast US, the maple is as good as it gets, so I get it locally when possible. It's much cheaper that way too. There's probably $6 worth of rough cut maple here:


It gets jointed (flattened on one face), then planed (thinned) until it's smooth, flat, and the size I need (.813" thick).


A hardboard template is laid on top to trace the outline and mark pin holes (like we used on the body). The template shown has my own headstock design. The neck I ended up making for this guitar has the no-no lawsuit headstock instead...don't tell anybody...


Roughed out on the bandsaw:


Wow, really rough. That's a little embarassing actually. But no matter.

And here is where it goes off plan a little too. The '54 has a one-piece maple neck. The neck and fingerboard is all one thick piece of maple. A channel is routed for the truss rod and the resulting holes are filled with a walnut skunk stripe on the back of the neck and a walnut plug on the headstock. I'm doing a two-piece neck instead. The fretboard is a separate piece of wood (although still maple in this case) and the truss rod is captured between the main neck and the fretboard, with no skunk stripe, no headstock plug. This is what we normally expect to see on rosewood-boarded necks but others (like EBMM and James Tyler to name two) commonly do it with maple fretboards too. I choose to do it this way because I think it makes more sense - simple as that.
 

Attachments

  • IMG_1006.jpg
    IMG_1006.jpg
    1,004.6 KB · Views: 7,242
  • IMG_0929.jpg
    IMG_0929.jpg
    944.5 KB · Views: 7,242
  • IMG_0930.JPG
    IMG_0930.JPG
    1.1 MB · Views: 7,241
  • IMG_0932.jpg
    IMG_0932.jpg
    1,012 KB · Views: 7,241
The roughed out neck blank goes face up on the CNC and the truss rod channel is cut. It curves in such a way that the middle of the rod is deeper than the two ends. This is a one-way "vintage-style" rod. It's anchored at both ends with thick steel washers. The pictures show a route cut all the way through the length of the neck for the adjusting nut. I experimeted with this method for a while. It works great and is very efficient but I don't like the look. So for the final neck I just have the normal hole drilled like you would expect to see on a vintage neck for the truss adjustment nut. When I'm routing the truss rod slot, I route a channel in the waste near the heel that acts as a one-time-use drilling channel. It guides the drill bit and then gets cutoff with the waste. I stole this genius idea from the Suhr factory tour videos...

The truss rod is from Warmoth ($10). I can make one from scratch for less, but not being a metalworker with a thread cutter, etc., their rod is better than I can do with a tap and die and some hardware store drill rod...and when you think about it from that angle, $10 is a good deal.

Anyway it looks something like this once the rod is in place:


A strip of maple from the same board as the neck is cut to fill the gap over the truss rod. It's glued into place, then once dry it gets shaved flat against the neck blank. The flat (not radiused, slotted, or fretted yet) fretboard can then be glued into place over the filler strip and truss rod. In this case I used a piece of slightly flamey maple I had hanging around for the fretboard. Normally I would try and match the neck and fretboard from the same piece of wood for a maple fretboard, but in this case I thought the flamey piece looked pretty good.

Once the glue dries, the fretboard is trimmed flush against the main shaft of the neck, a couple pin holes are drilled for fixturing again, and the neck goes face down on the CNC. The mounting pilot holes are drilled and the back gets carved:


To be continued...
 

Attachments

  • IMG_0942.jpg
    IMG_0942.jpg
    1 MB · Views: 7,238
  • IMG_0941.jpg
    IMG_0941.jpg
    1,017.8 KB · Views: 7,238
  • IMG_1016.jpg
    IMG_1016.jpg
    1 MB · Views: 7,238
  • IMG_1027.jpg
    IMG_1027.jpg
    902.7 KB · Views: 7,250
  • IMG_1032.jpg
    IMG_1032.jpg
    1 MB · Views: 7,237
That's awesome man! :rock:

I personally think CNC is the way to go since there's less human error involved. If I had the dough, I'd get a CNC machine and do what you're doing.
 
Vrad":2796q60a said:
That's awesome man! :rock:

I personally think CNC is the way to go since there's less human error involved. If I had the dough, I'd get a CNC machine and do what you're doing.

My workshop is only about 10x20'. I basically had to make a choice - fill it with "traditional" tools or get the single CNC with a smaller footprint that fills the role of most of those traditional tools. There are lots of upsides. The safety is a big one. I've already taken off enough of two fingertips that they won't ever be right again. So I'm eager to avoid more of that.

The downside is like I said learning to drive the damn thing. Unlike the tele body, all the other body designs I use and all the neck designs were all drawn from a blank slate. I'm over a year into it and just starting to get to the point where I'm happy with most of the results. I wasted a LOT of wood in the meantime. It's all trial and error.
 
The back carve takes 20-30 minutes of machine time. When a neck comes off the CNC it's pretty ugly. This is the part you usually don't see.


More shaping is done with rasps and the machine marks are sanded out with 80-grit by machine and by hand until it starts to take on a more pleasing shape.

 
Back on the table, face up this time. (The neck in these pictures is actually one-piece with NO truss rod but that's a different story for a different thread.)

With the face up, the headstock gets thinned down to the proper thickness and the "ramp" from the fretboard area down to the headstock gets rough shaped. About 20 minutes on the machine:


All of these "3D" types of cuts are done with a "ballnose" cutter - a rounded cutter, to get a smooth profile. Unlike the pickup cavities on the body, for example, which were done with a regular cutter with a flat end.

The fretboard radius is roughed out in about 6 minutes. The neck shown is 7.25" but our final neck is 10" which is my preference for a good vintage/modern compromise.

I say 'roughed out' because it will be sanded by hand with radius blocks to get to the final shape/finish.


You can see the index holes that were used when the neck was face down. These are strategically placed so that they will be covered by inlay dots later. If I had to do a neck with no inlays I'd be fucked. :D
 
Back
Top